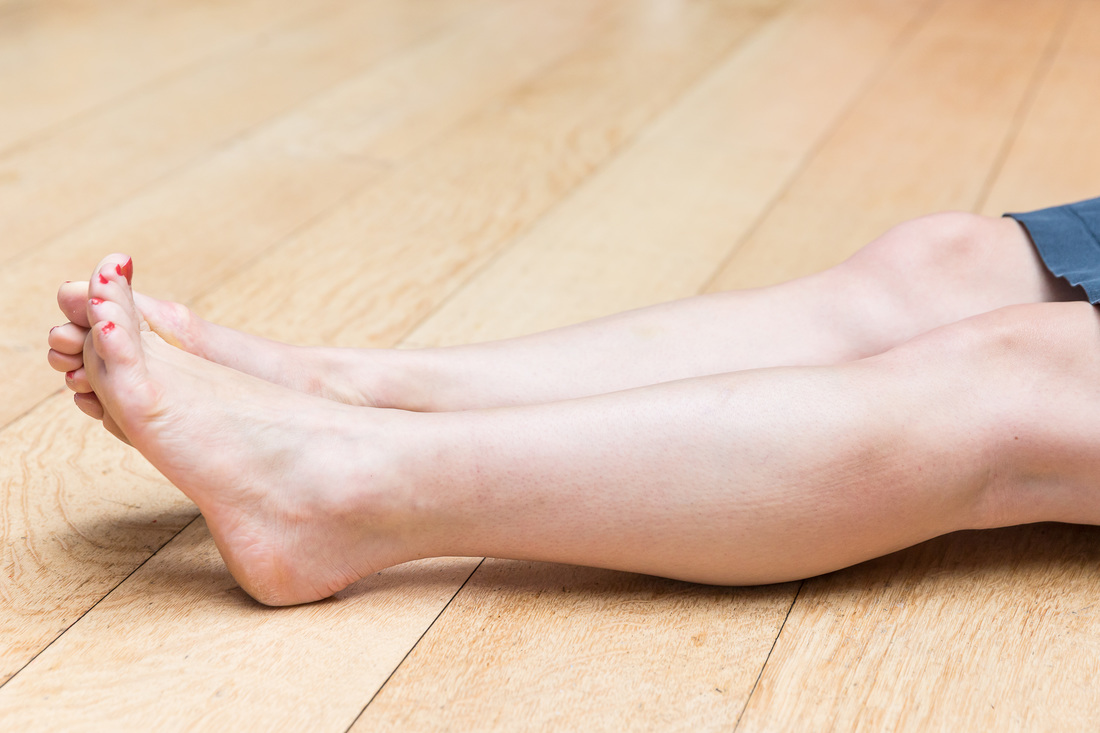
Proprio….what?? Proprioception, or position sense, is your awareness of where your limbs are positioned relative to the rest of your body, allowing you to control them without directly looking at them. So, for example, a running jump to catch the ball. If you didn’t have proprioception, you would need to be looking at both your hands to catch and your feet to land otherwise you would accomplish neither – ouch! There are proprioceptive sensors in muscles, joints and ligaments that send ‘postion messages' to the brain via the central nervous system. When you damaged your ankle ligament(s), you damaged these sensors which means your body no longer knows exactly where your foot is, your coordination may be a bit off, and you are more susceptible to going over on your ankle again. But, don't worry! A few simple strengthening and proprioceptive exercises will get that control back.
Before starting this second phase though, a brief reminder of those rules!
It’s from this stage that equipment will be introduced for certain exercises. If you don’t have any of the items listed below, you can easily purchase them from your nearest specialist sports shop or probably more cheaply online. Or, you can use items around your home....just make sure you ask your mum first!
Before starting this second phase though, a brief reminder of those rules!
- Do listen to your body and STOP if you feel pain.
- Do follow the exercises in order and only move on if ankle is pain free and feeling stable.
- Do revert to the previous exercise if your ankle doesn’t cope with the new one.
- Don’t rush or overdo things.
It’s from this stage that equipment will be introduced for certain exercises. If you don’t have any of the items listed below, you can easily purchase them from your nearest specialist sports shop or probably more cheaply online. Or, you can use items around your home....just make sure you ask your mum first!
| |
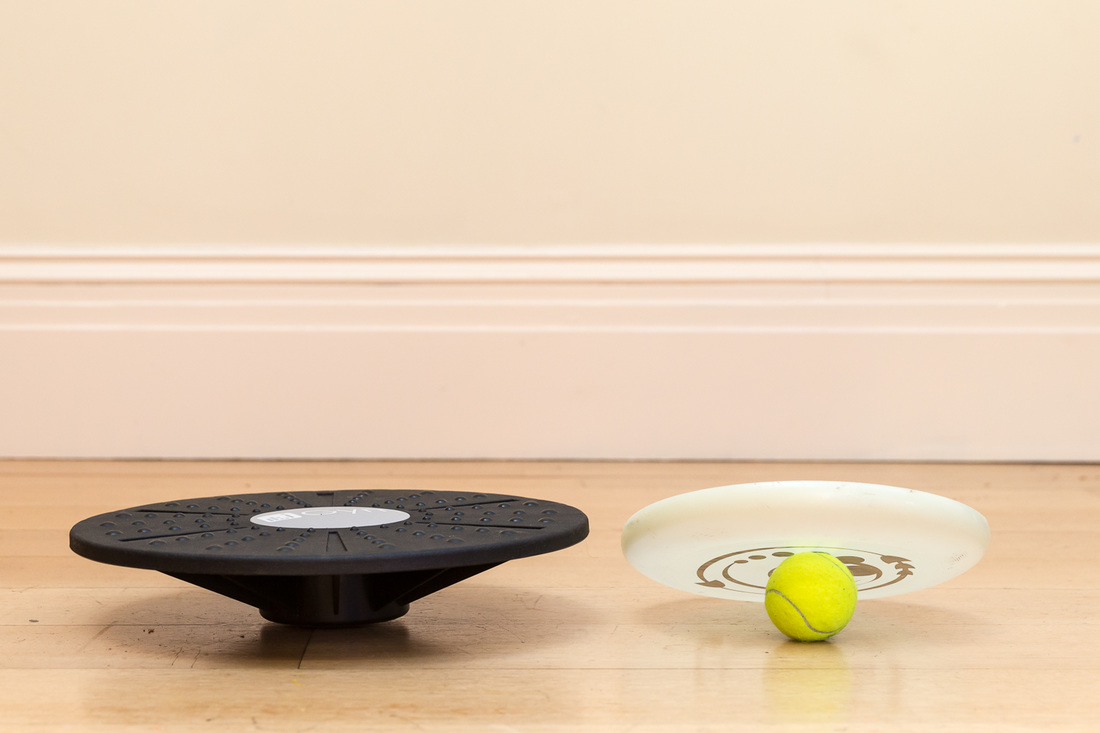
Sit on a chair with both feet on a balance board (or your picnic plate or frisbee equivalent). For 2 sets of 30 seconds, roll it forwards, backwards and then side to side. If comfortable and pain free, do another 2 sets of 30 seconds making small and increasingly larger circles. Then do exactly the same, using only one foot at a time (the uninjured foot first).
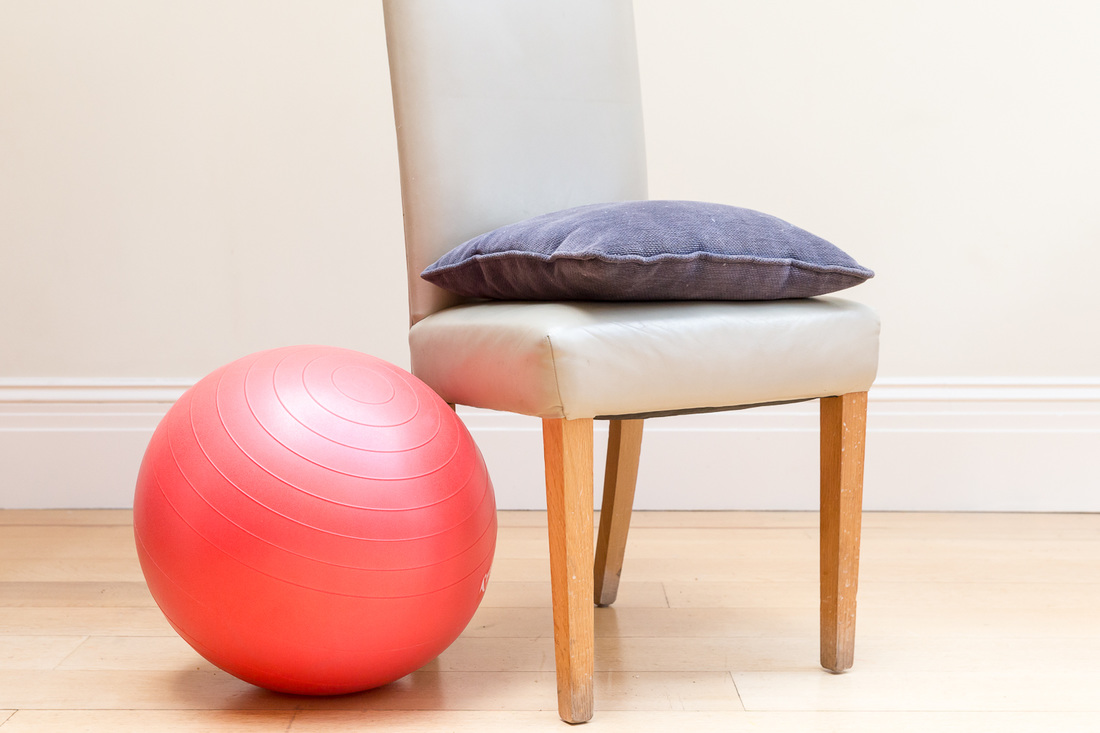
Next, sit with your uninjured foot on a netball (or any ball but larger than a tennis ball) and roll it forwards, backwards, side to side and diagonally for 2 sets of 30 seconds.
| | 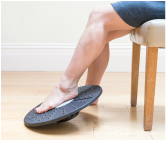 | |
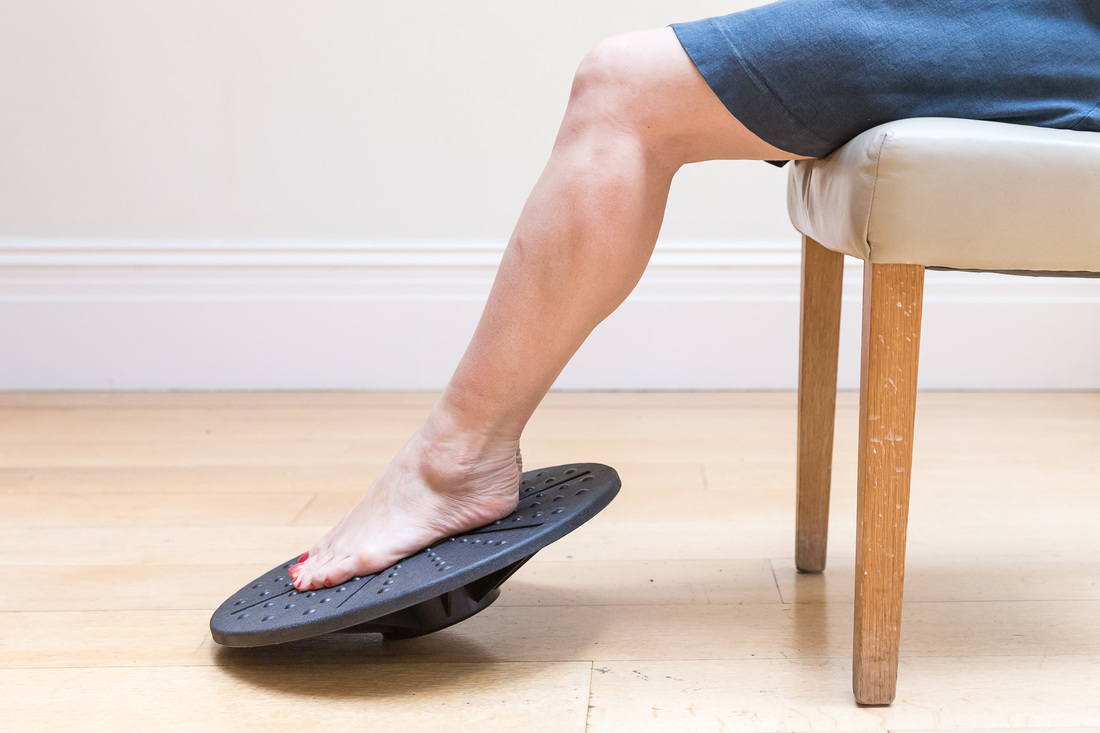
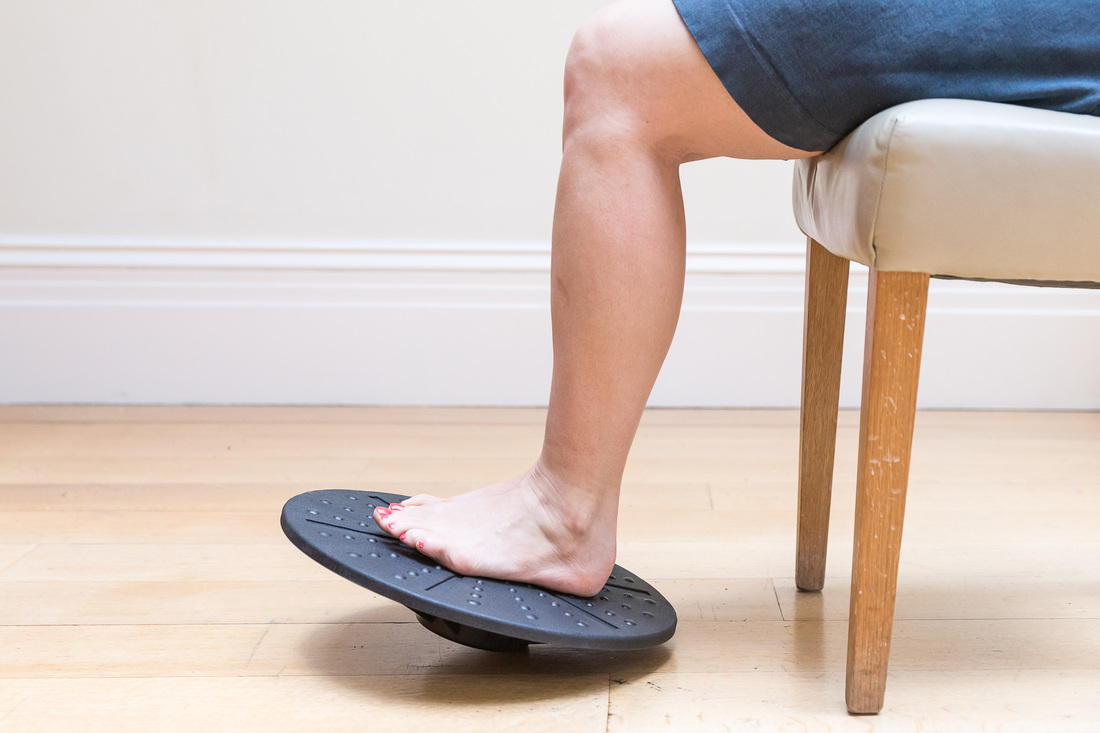
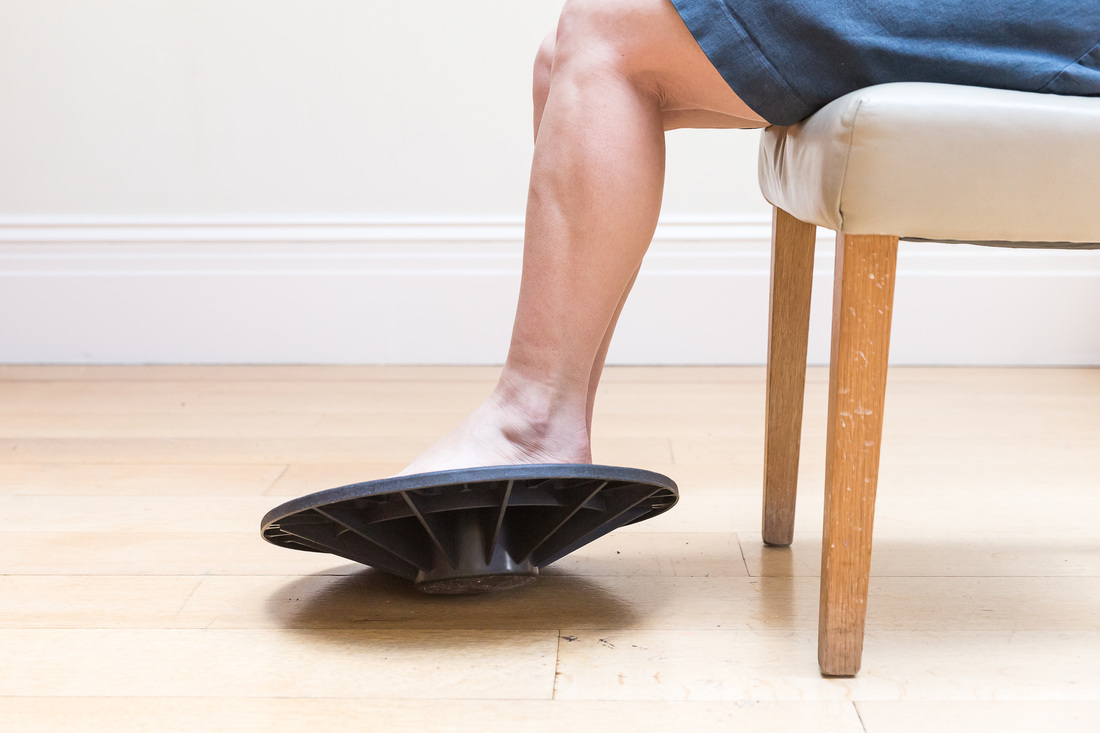

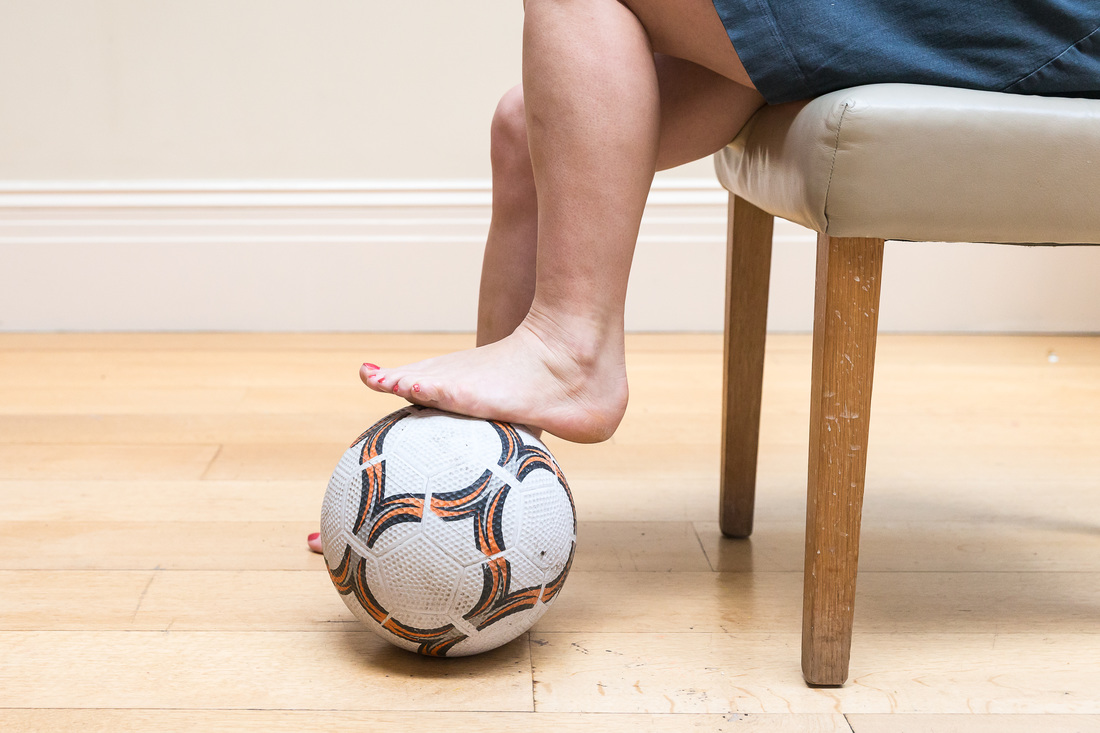
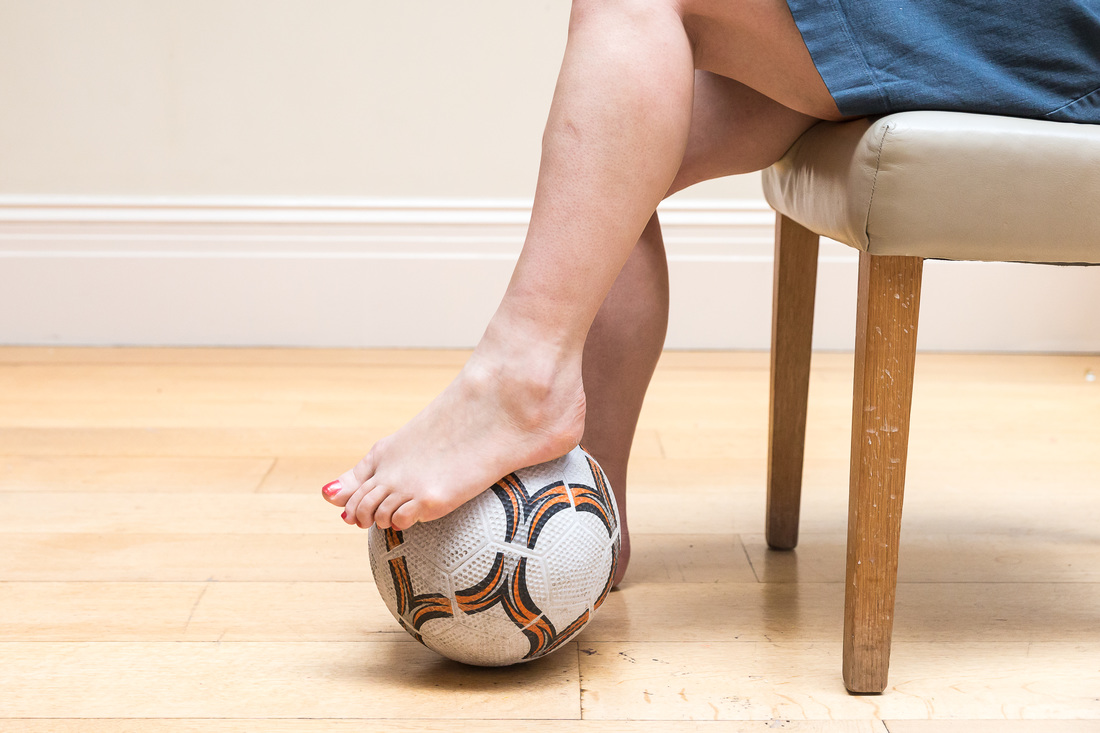

Two feet on wobble board One foot on wobble board One foot on netball
If doing the single foot exercises is too much, just put both feet on the balance board and roll it around for 30 second intervals until you are ready to proceed.
Now to work on regaining some of that strength. You’ll do this first with no movement (known as "isometric exercises") so as to not stress the ligaments. Working on your uninjured ankle first, use your other foot as the resistance, and perform 3 sets of 10 dorsiflexions (when you bring your toes towards your shin), 10 plantar flexions (when you point your toes), 10 eversions (when your windscreen wiper foot turns away from the other foot) and 10 inversions (the windscreen wiper turns towards the other foot). As before, take care when inverting as this is the movement that led to your injury.


Use one foot to 'resist' the other's movement into dorsiflexion, plantar flexion, eversion and inversion
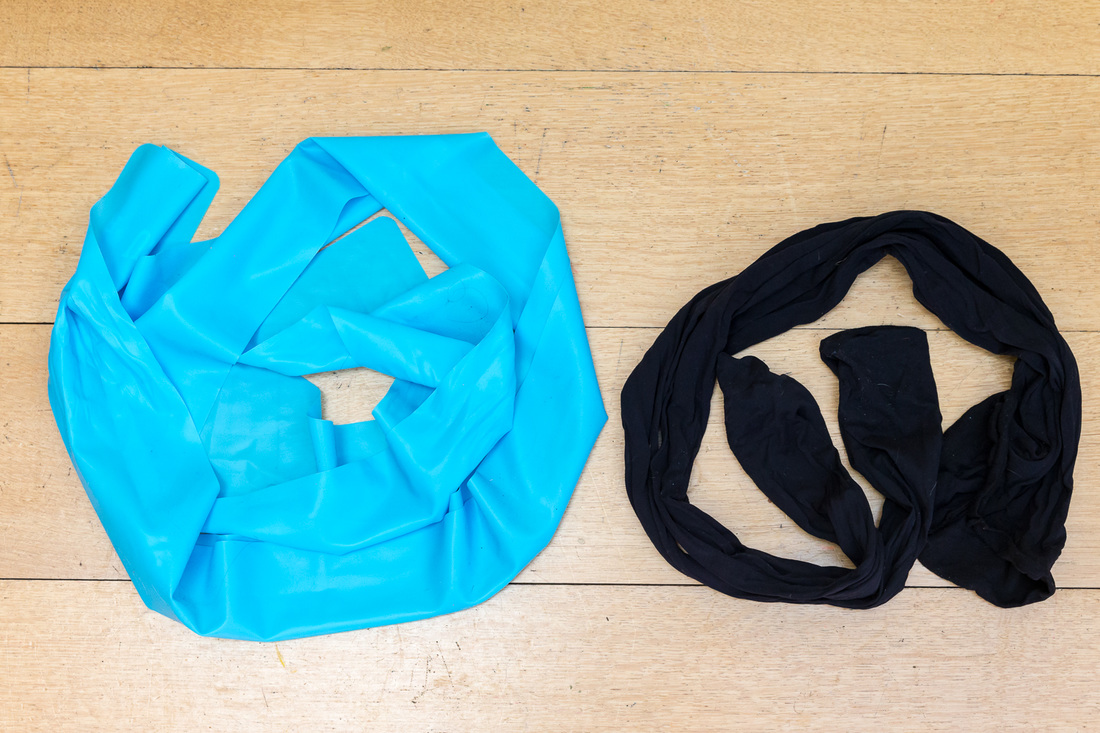
If all pain free and feeling good, it's time to add in some movement ("isometric" exercises) using a resistance band (or old pair of tights). It will be the same process for each movement: wrap the band (or tights) around your foot as shown below, and holding the other end, gently pull it in the opposite direction so you feel a very light resistance. As you dorsiflex (toes to shin), plantar flex (pointed toes), evert (turn your foot out) and invert (turn foot in), hold the band in place so that resistance increases. Start off with 2 sets of 10 of each but only going to near your end of range of movement, just to be on the safe side. If pain free, progress to reaching that end of range before returning to neutral.
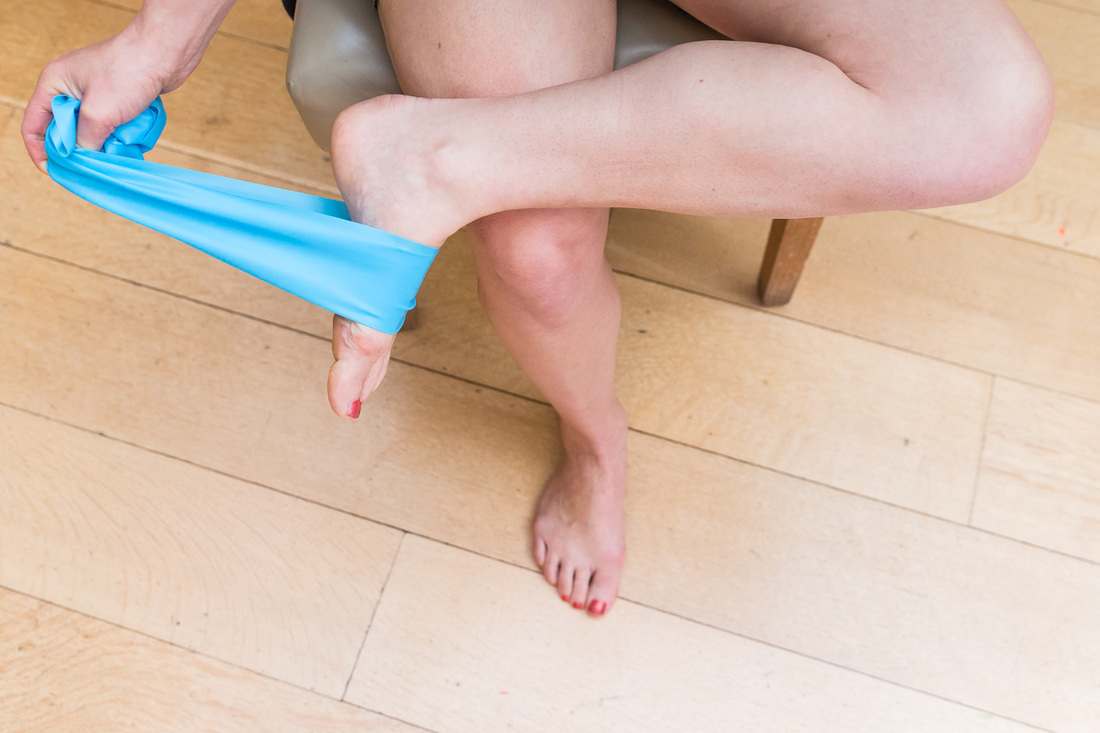
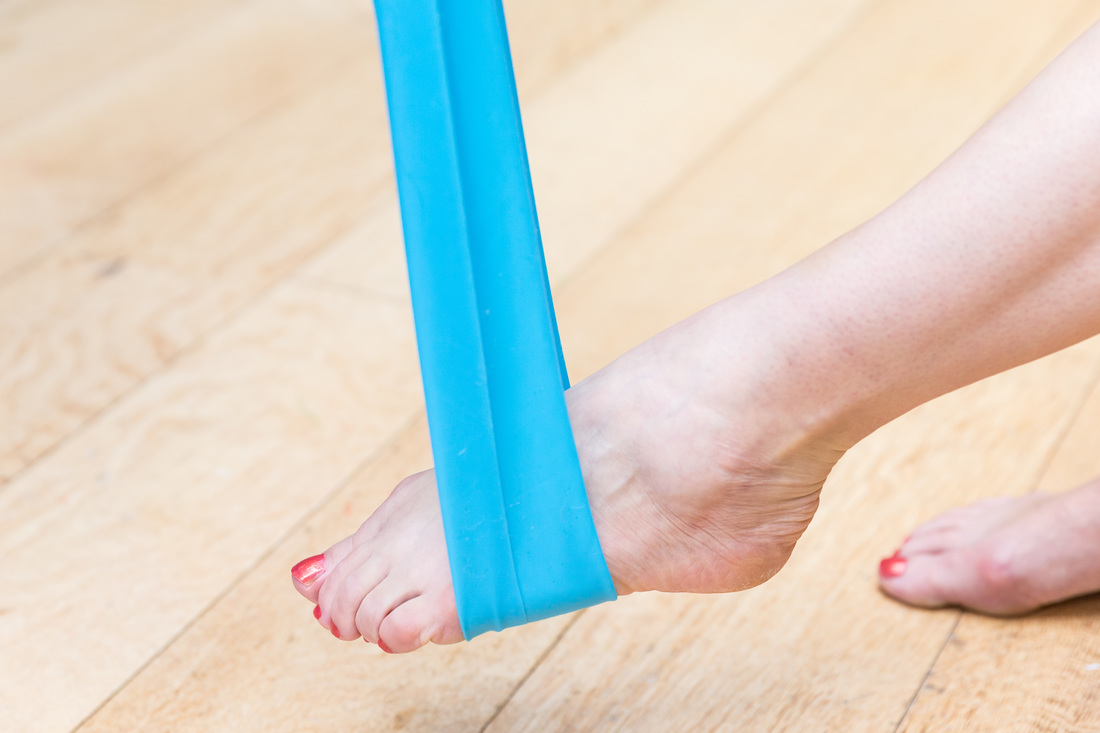
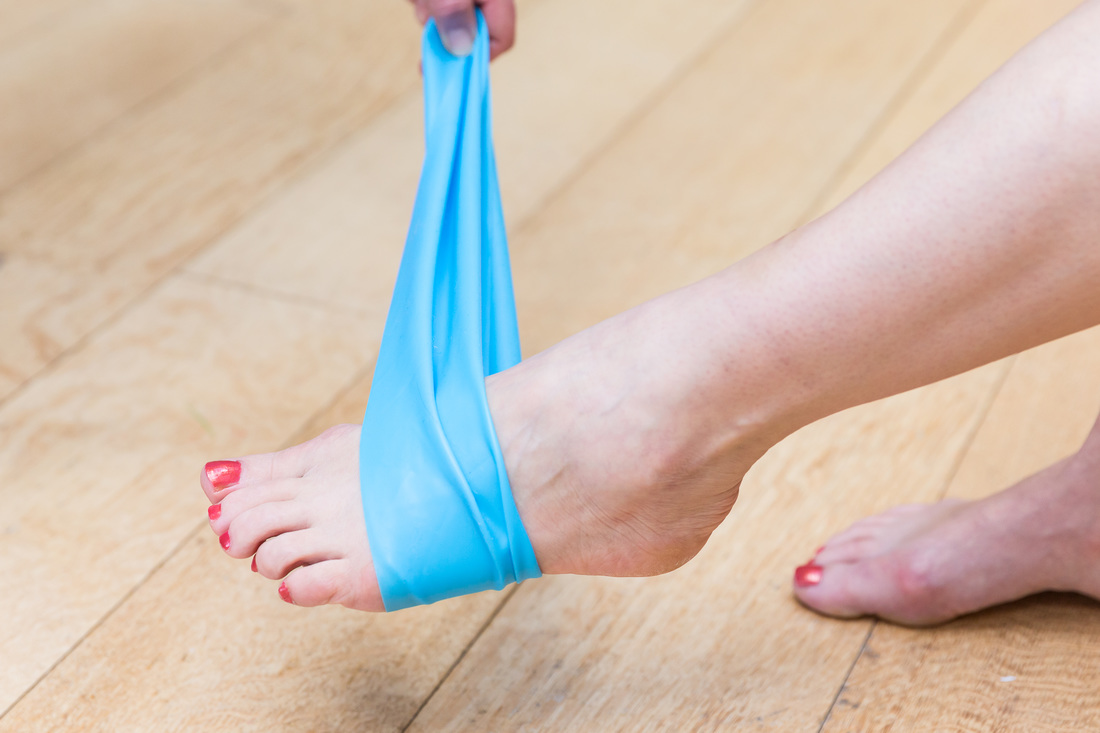
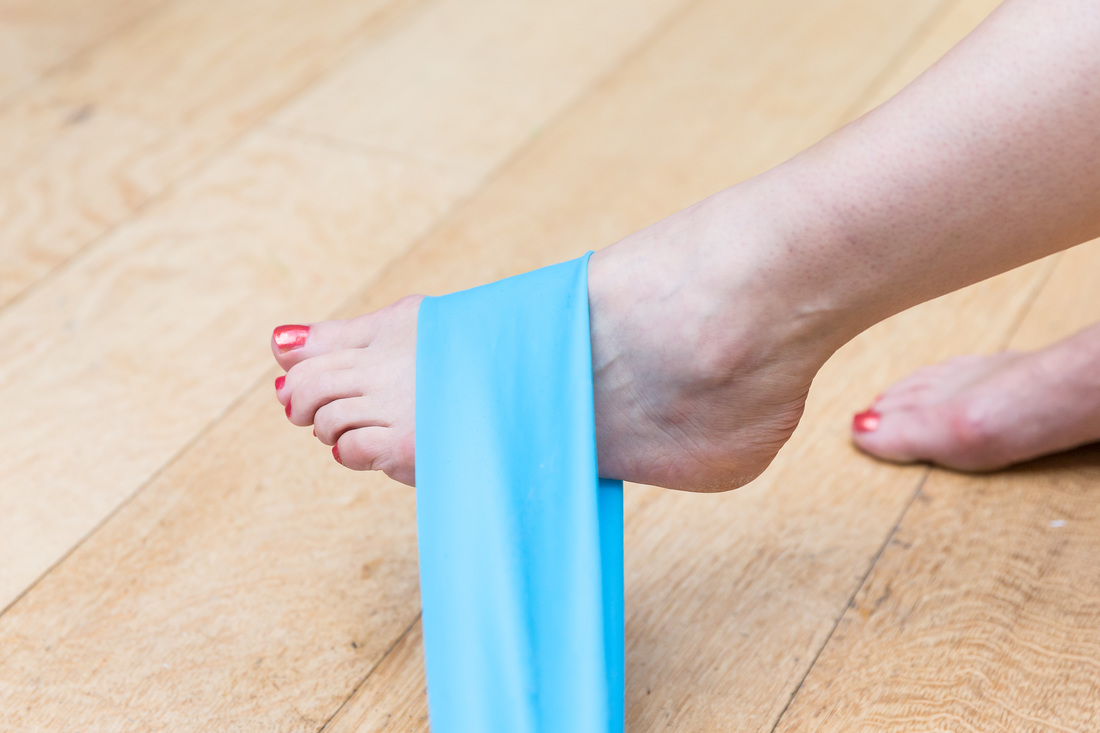
Use resistance band to allow for some movement, releasing the hold when you are near and then at end of range
To add in a bit of essential core work, and so you don’t forget what a netball feels like (!), sit on a swiss ball opposite a wall, and throw and catch a netball for 2 sets of 30 seconds. Start off with both feet on the floor with your weight evenly distributed between them, as you are not quite ready to put weight on your injured ankle yet. Then, keeping both feet on the floor, try rocking from side to side whilst throwing and catching, so you are moving your weight from one foot to the other. Once you feel ready, lift your injured foot up for 30 seconds, and then your uninjured….making sure your ankle feels stable enough to do so. If not, STOP! Go back to where your ankle did feel pain free and stable.
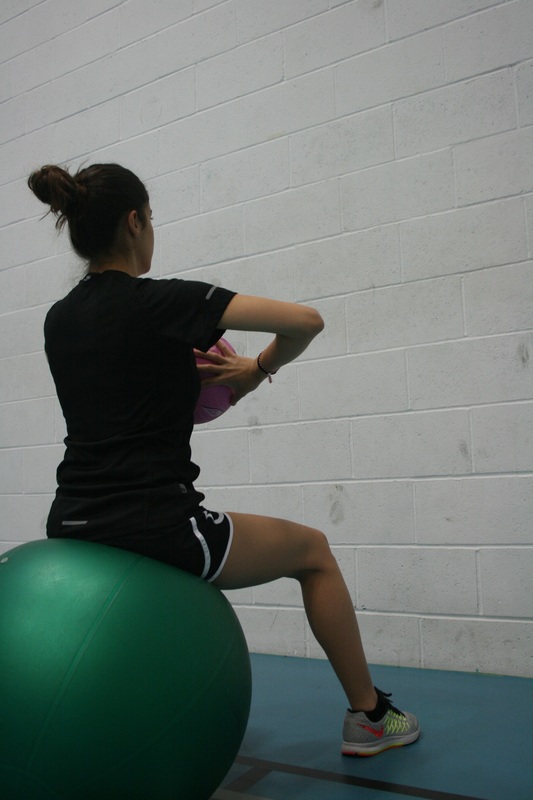

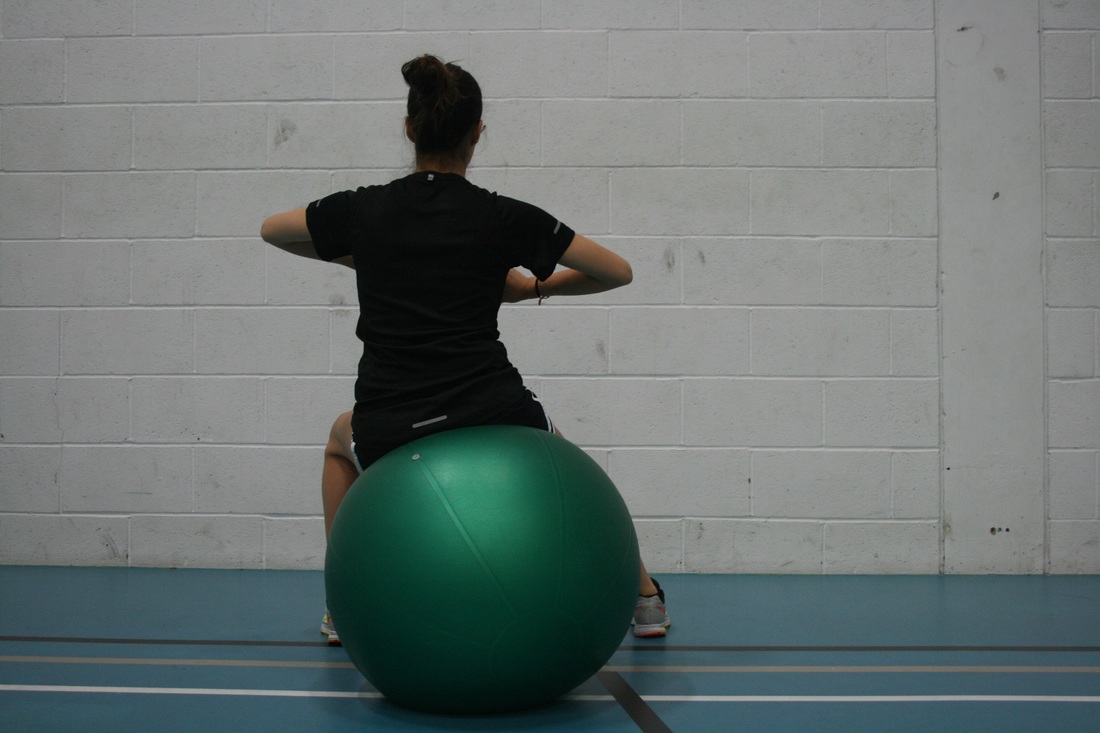

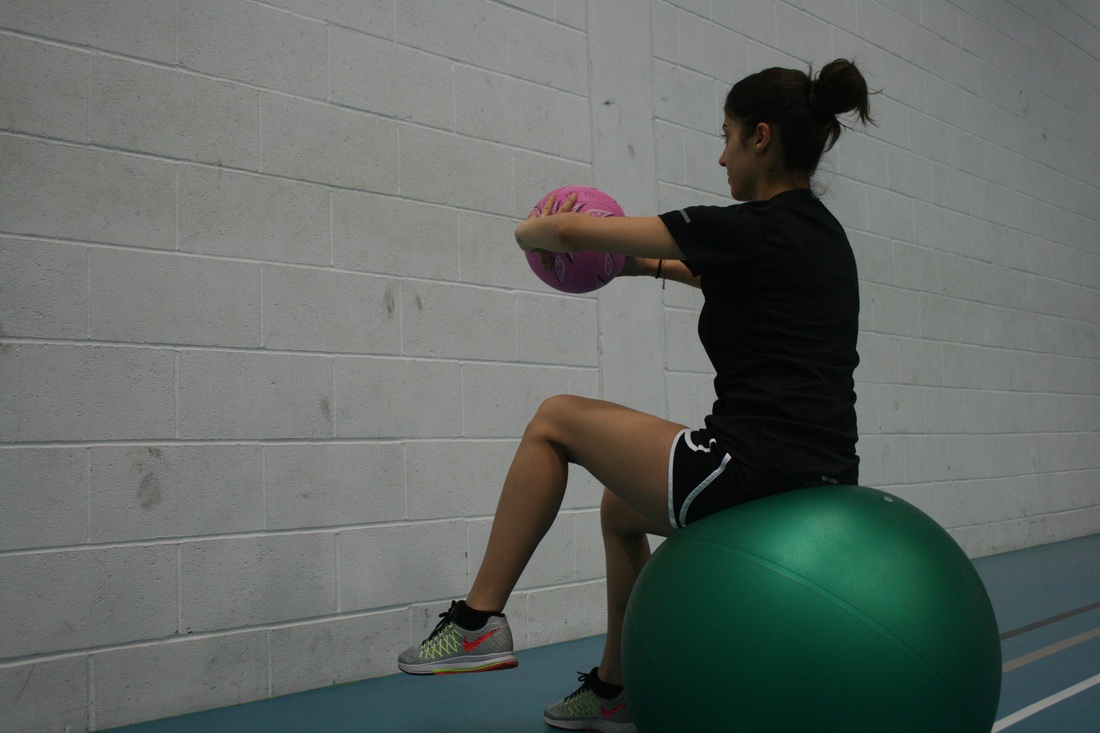
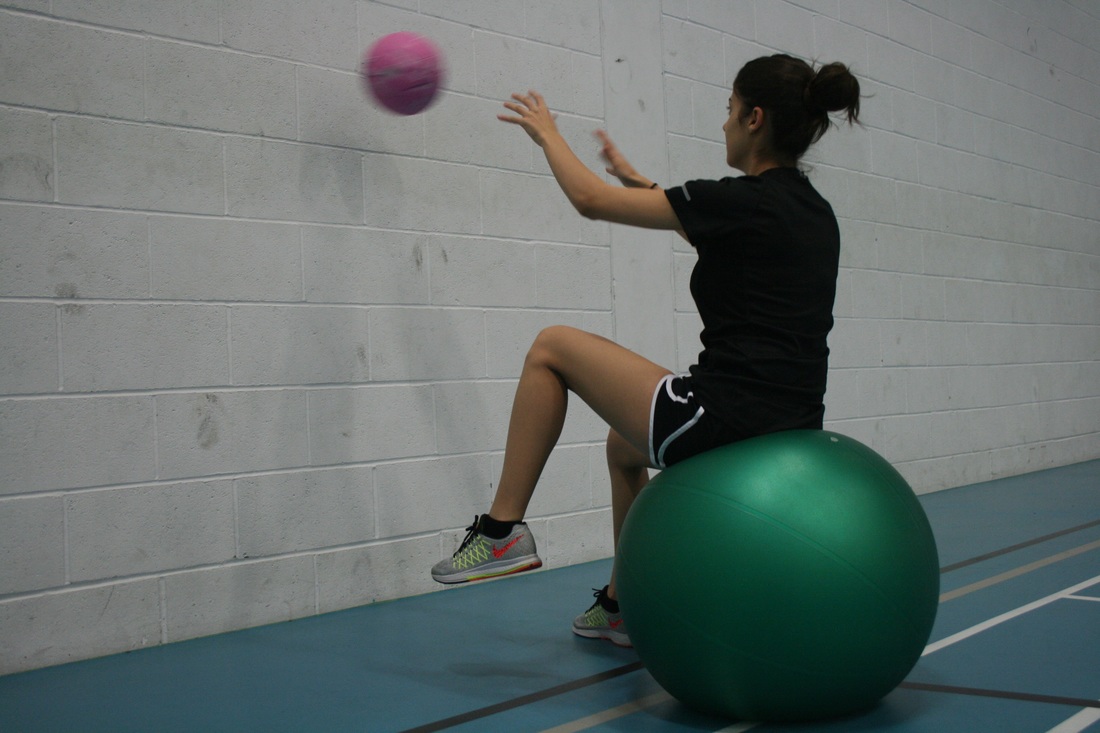
Throw & catch: both feet on floor, shifting weight from side to side; lifting one foot (injured first) off floor
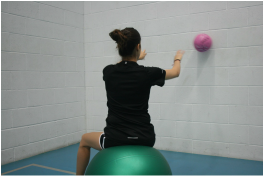 | Next move yourself to a corner of a rooml. Start by throwing and catching randomly off each wall, and then move through the same progressions: shifting your weight from side to side; lift your foot (injured first), for 30 second intervals. If you would prefer, start by throwing a tennis ball before the netball. Sitting on the unstable swiss ball all helps your proprioception. But remember, if you feel any pain, STOP! Unstable seat in corner position |
So now you are probably ready to stand up and take some weight and further improve your proprioception. Aim to stand for at least 15 seconds in each of these stances, first with eyes open and then eyes closed. Be careful! Have something you can lean on nearby (like a wall) just in case you start to topple as it’s harder than it sounds! And only progress onto the next level when the previous one has been achieved pain free:
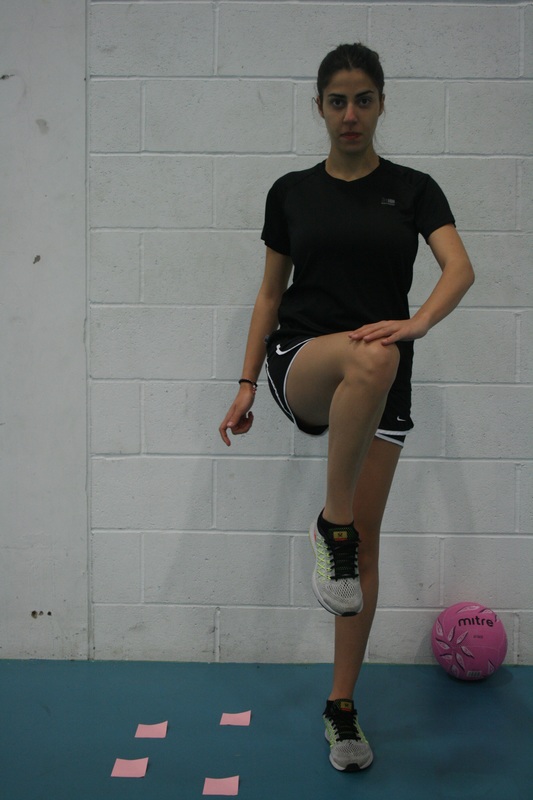
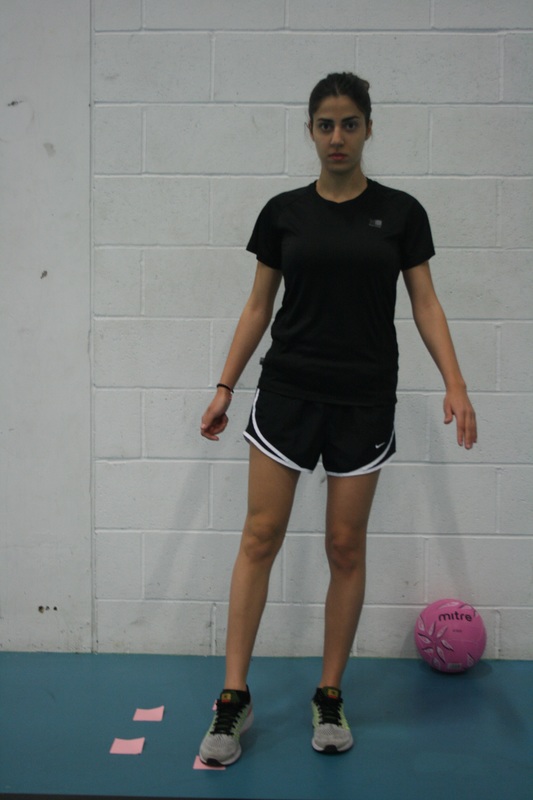
| 1. First of all, stand, looking straight forward, with your feet hip width apart. As a reminder, stand first with your eyes open, then repeat with your eyes closed....and remember, it's harder than you think!; 2. Stand with your feet together (again doing the exercise with your eyes open and then with them closed); 3. Stand on your uninjured ankle, other foot lifted to a low knee position (eyes open, eyes closed) - repeat standing on your injured ankle; 4. Stand on your uninjured ankle, other leg in a high knee position - repeat standing on injured ankle; |
|
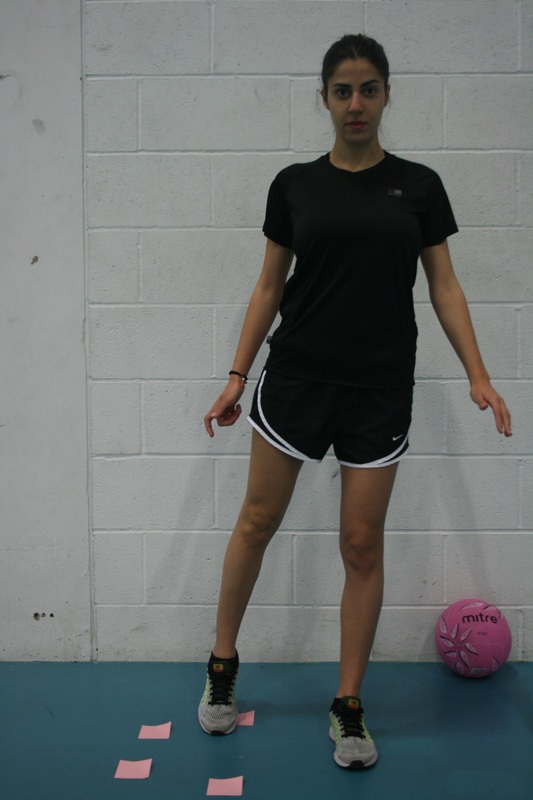
5. Stand on your uninjured ankle next to four 'markers' on the floor (which can be ANYTHING as long as they stay still),
with your opposite hand palm down in front of you, bring your other knee up to touch your palm and then get that same
foot to touch one of the 'markers' on the floor. Repeat this knee up and then touching a 'marker' cycle, making it a
different marker you touch every time. As with the two previous stances, repeat standing on your injured ankle.
 |  |  |
Congratulations, you are now full weight bearing!!
| So now try that throwing and catching in the corner of the room exercise whilst stood up on two feet and then single legged (uninjured first). You can always start with the tennis ball for 30 seconds, and then use your netball. | 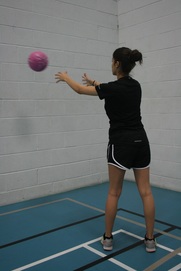 |
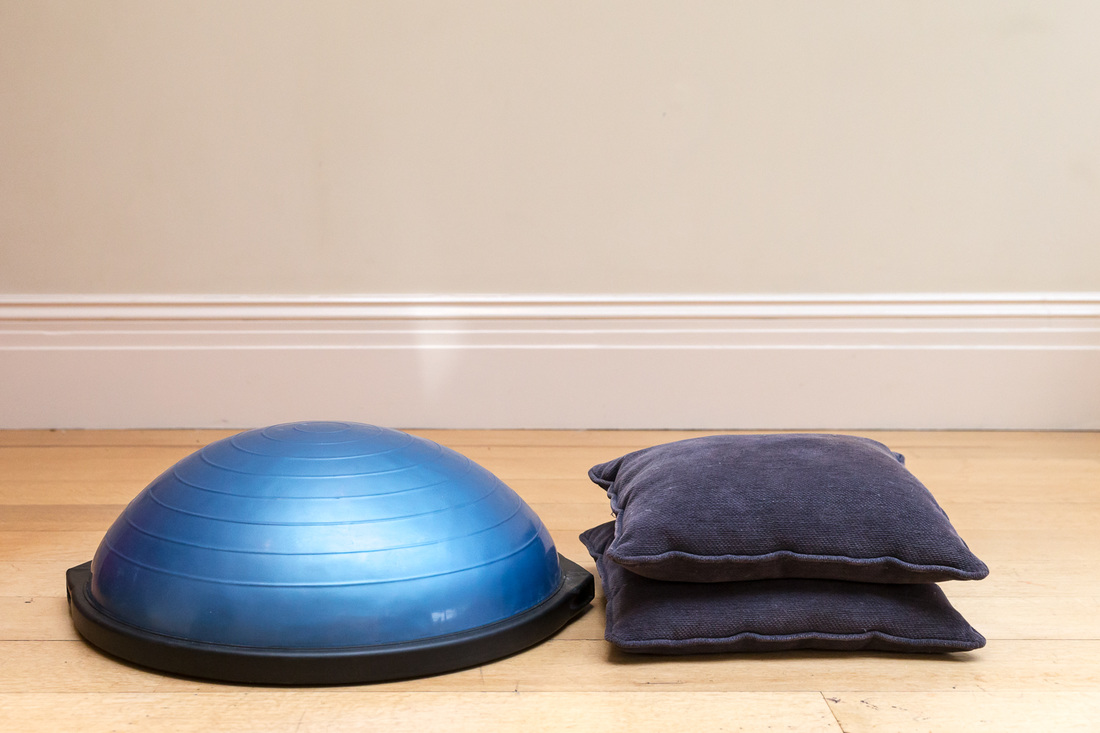
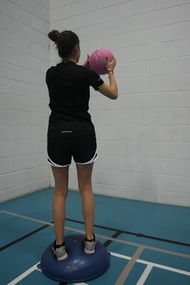 | A great way of really nailing this proprioception is to use another unstable surface, so try the throwing and catching in the corner drill whilst standing on a bosu (or cushion equivalent), first on both feet, then on just one foot (uninjured first). Initially limit it to 30 second intervals, but if the ankle feels good and pain free, you can carry on for longer. Just make sure you stand tall (with your bottom tucked in) throughout. |
Remember to stretch after each session! Whilst seated, slowly bring your foot into dorsiflexion (toes towards your shin). You will also feel a stretch in your calf. Hold this stretch for 20 seconds and repeat 3 times. Do the same for plantar flexion (pointing your toes), eversion (foot turns away from the other foot) and inversion (foot turns towards the other foot). Just make sure you are not too vigorous, especially when inverting your foot.
If your ankle is pain free and feeling stable, and you are successfully fully weight bearing, you are ready to move on to Netball Rehabilitation Stage 3: Getting In Some Netball Moves. If you have any doubts, remember to R.I.C.E and/or go back a stage. Only move on once you are ready.
 RSS Feed
